Ages ago, I stumbled on a blog called Scarf Ace and I always remember the name because it is so much like Scarface. So I'm borrowing the name for today's blog post title.
I'm a scarf addict and am always on the lookout for scarves or scarf makings. I found a perfectly sized dark brown velvety piece of fabric at my favourite notions store for 59 cents. I just need to find something for the other side:
Hmm, will have to learn to take better pictures - it is not showing up very well. It could probably be used as is if I just trimmed the edges a bit to make them straighter - it doesn't seem like an-easy-to-fray fabric, but I like the idea of having a reversible scarf.
Unfortunately, the project will have to wait until the weekend though as the first round of lay-offs are starting tomorrow. I think it'll be about 130 people. Not good.
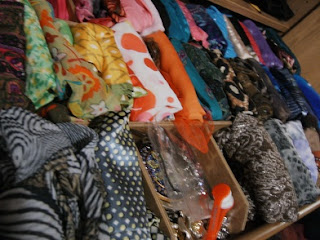
Let's end with a pic of my scarf collection:
See that 2nd one? the black, white and yellow one? That was made from a long piece of fabric which I originally intended for a blouse. I even bought a pattern, but chickened out at the last minute and made it into a scarf. Best. Decision. Ever. Lots of people have complimented me on it, so it is one of my "proudly made by me" items.
Wednesday, 30 November 2011
Tuesday, 29 November 2011
|
|
Apologies, Mr Miyake |
I read an article in a fashion magazine about young moderns and it girls in London taking scissors to designer duds and creating their own look. Hah! I thought, who would slice up designer clothing? Who even has designer clothing to slice up?
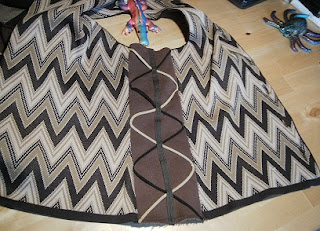
Then I came across an Issey Miyake zig-zag vest. It's in that currently popular zig-zag that Missoni uses but is from several seasons ago:
I could button it up, but it was a bit on the tight side. Several months passed while I thought about how to personalize it. Then my favourite notions store had some stuff on sale, which I bought and just left in the sewing box.
Finally one day I took the plunge and proceeded to slice up the sides. I ended up putting a fabric piece into each side and criss-crossing some suede strips over it. I think it looks okay:
You can't really see it when it's on, but it adds a bit of interest if you move.
Project Post-mortem
- It still feels unfinished and I'm looking for some very dark dark brown trim to finish it off
- I also hate the buttons and will probably replace them with something darker and perhaps slightly shiny
- Now that I'm doing the weight loss thing, I might just sew it back up when the countdown clock gets down to zero.
Monday, 28 November 2011
|
|
Bag Lady |
One of my kids made a pair of elastic waist shorts in school. Yes, boys learn to sew in school now. My other son made a backpack style gym bag! They probably both sew better than me - at least they sew straight.
Anyway, there was some leftover fabric, so I thought I'd try to make a draw-string lunch bag. For me, the hardest part was figuring out how to sew the tube bit that the cord is pulled through. I think it looks great:
Since then, I've made another lunch bag with an oddly shaped piece of fabric which I had to sew into the correct shape first:
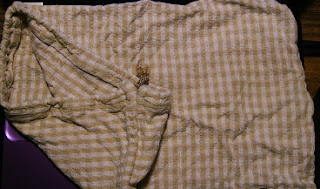
and quite a few bags to hold freshly baked bread. I use new tea towels. Here's one:
The bread bag idea I got in Spain. I remember when I was there that some people would take a bag to the bakery and come back with it full of fresh bread.
I'm still not very good at making these bags. The corners are always lumpy, it's hard to find a suitable cord and I never know how long of a cord to use.
Sunday, 27 November 2011
|
|
Swag Bag |
This is an almost no-sew project. You quite often get swag bags from conventions or courses etc like this one:
I've used this one once and loved the size, but didn't really like "advertising". I wanted to use it again on December 5th to lug some stuff, so decided to spruce it up a little.
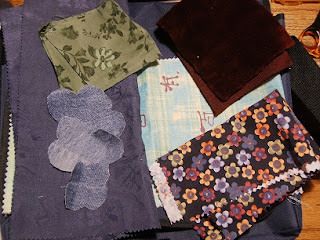
My original idea was to make a giant pocket over the flap to cover the writing, using the multi-colour floral fabric in the bottom right of the pic:
But, it was a bit thin, and I would've had to reinforce it with denim or something underneath.
So I just cut up some denim "flowers". They are also shown in the pic on the left. But I didn't really want denim, so trashed that idea.
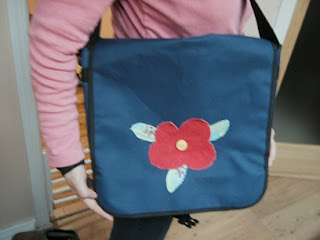
Finally I decided to use some pink cord fabric I had to make a giant flower and another greenish fabric to make some leaves.
The flap is not really sewable - it's lined with plastic or something and has secret pocket underneath. So I glued it.
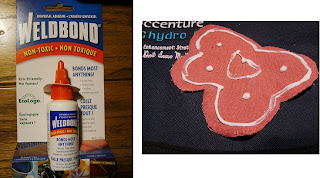
I'm using a non-toxic glue which I've used before to fix a pair of sandals, so I think it's quite strong. Here is the flower and leaves glued in place:
It still seemed to lack something so I added button (that's the only sewing I did), et voila:
I'm hoping the glue will stick, but if not I'll either break down and try to tack it in key places or use that bumpy coloured fabric stuff to hold it down.
Saturday, 26 November 2011
|
|
A Weighty Issue |
One of my other "interests" if you can call it that is trying to get back to what I consider a normal weight. My doctor would love it if I lost about 30 pounds and I would too. I'm currently at a hefty 158 pounds !!!! (almost 72 kilos or 11 stone). This is way too much for my height and frame, so, I've set myself a goal that by the time I'm laid off (see the layoff counter above my pic) I'll be back to a svelte 128 pounds (58 kilos or 9 stone).
This sounds easy, because there's more than a year's time to do it, but what with goodie days at work, too few hours in the day and lack of willpower it's going to be a challenge.
Here's my weight loss plan:
So today, I had a dental appointment and instead of getting a ride home from my husband Big J, I walked for 30 minutes at a fast clip.
The hard part for me will be the time to do the workouts and the healthy eating. While I love fruit and veggies, I also love breads, cheeses, chips and other calorie-laden foods.
I'm hoping to record my progress on the weekends, so that by the time Spring 2013 rolls around I'll be back to a slim-trim me.
Benefits for me:
This sounds easy, because there's more than a year's time to do it, but what with goodie days at work, too few hours in the day and lack of willpower it's going to be a challenge.
Here's my weight loss plan:
- Walk as much as possible.
- Do wii-fit on the weekends.
- Do a daily 40 minute workout on the elliptical trainer.
- Healthier eating
So today, I had a dental appointment and instead of getting a ride home from my husband Big J, I walked for 30 minutes at a fast clip.
The hard part for me will be the time to do the workouts and the healthy eating. While I love fruit and veggies, I also love breads, cheeses, chips and other calorie-laden foods.
I'm hoping to record my progress on the weekends, so that by the time Spring 2013 rolls around I'll be back to a slim-trim me.
Benefits for me:
- Better health, increased vitality
- Clothes will fit and look better
- Easier to run away from bad-guys!
Friday, 25 November 2011
|
|
UpSize a T-Shirt |
It's quite easy to downsize a big t-shirt, but sometimes you need to upsize a shirt if it's a bit too revealing. I like my clothing a little looser so you don't see all the lumps and bumps underneath.
I tried it out on an old t-shirt. You need a long-sleeved one because the sleeves are used for the extra material. If you are good at mixing fabrics, textures etc you could use a different fabric - but I'm completely useless at that.
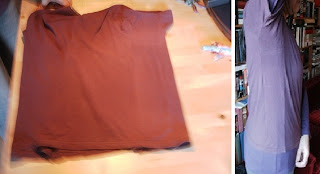
This one was done quite a while ago, so I only have after shots, but here is a pic of what you have to do.
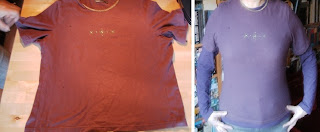
Here are some after pics.
This is the side insert:
This is the front:
Et voila! Upsized and wearable!
I tried it out on an old t-shirt. You need a long-sleeved one because the sleeves are used for the extra material. If you are good at mixing fabrics, textures etc you could use a different fabric - but I'm completely useless at that.
This one was done quite a while ago, so I only have after shots, but here is a pic of what you have to do.
- First you have to measure everything. Always measure and re-measure to be sure you have enough material.
- Decide where you want your sleeves to end (remembering to include room for the sleeve hem). Make sure that the cut-off part of the sleeve (the blue) when doubled (there are 2 sides to the sleeve) and joined together is enough to span the length of the complete side of the t-shirt from hem to sleeve (this is shown by the red line)
- Re-measure before cutting.
- You can include the hem of the original sleeve and sew to the hem at the bottom of the t-shirt.
Here are some after pics.
This is the side insert:
This is the front:
Et voila! Upsized and wearable!
Thursday, 24 November 2011
|
|
Scarf for a Blustery Day |
Another windstorm today (they say up to 100 kmh) so perfect time to talk about a warm & fuzzy scarf I made from 2 scraps of fabric. I was browsing magazines in the grocery store and saw a "simple" scarf project in one of the sewing magazines. It was fleece on one side and silk on the other and looked fairly simple.
Even though I don't sew, I'm an obsessive scrap fabric collector and just happened to have a small piece of fuzzy fabric which seemed about the right size for a long narrow scarf. It's either a thick fleece or a faux fur, don't really know. I had to cut it in half (it was more square than rectangular) and sew the two pieces together at one end. I also had another piece, not silk but something thinner for the other side (it's the same fabric I used for one of the "flowers" on the Jean Bag Project).
I just stitched them right sides together and then flipped it right-side out.
Here's a pic:
It's a bit clumsy looking if you look closely - the "silk" side is wrinkly - it might be too big or something. But, it's cozy, goes well with black, brown, grey clothing and since I always wear it with the fuzzy side up, you can't tell.
Project Post-mortem:
- It's a bit too short to stay in place by itself - you can't wrap it around your neck, you have to just have it crossed over in front, so I'm thinking of putting a hair elastic on the "silk" side to insert one end through
- This project would probably be easier with a thinner fabric on the fuzzy side. I think it was the fuzziness which caused the "silk" side to wrinkle.
Wednesday, 23 November 2011
|
|
Jean Vest Refashion |
I had a denim vest which I didn't really like for some reason. It had points in front and seemed a bit frumpy. I ended up just putting 2 strips of lace down the front. It's a bit hard to see in the pictures, but by fluke the colours in the lace just happen to match the stitching.
It's not really trendy, modern or anything but I think it looks okay and I actually wear it in the summer when I want a bit of coverage without the weight/sleeves of a jacket.
Today was jeans day at work for the United Way. Our campaign goes for two weeks and they have special events each day to raise awareness. So I wore this vest with a big scarf because it was cold.
Tuesday, 22 November 2011
|
|
Jean Bag Refashion |
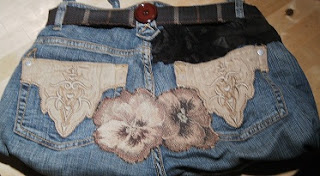
My first foray into re-fashion began a long long time ago in grade 5. I remember cutting up a perfectly good pair of Wrangler jeans to make a jean purse. The bag's opening was too small and there was no closure at the top. I think I used it to lug library books.
Fast forward more than several years to the digital age and while surfing the web, I came across a jean purse contest. I wish I could post the link, but I've changed computers since then and have lost the link. Some of the bags were so creative, it re-kindled the spark in me and I began to research the jean purse idea. I hemmed and hawed for years scouring magazines and web sites for ideas. I collected trims and bits of cloth while procrastinating, hesitant to begin due to a lack of sewing skills.
Finally, a favourite pair of jeans became too ripped and torn to wear. I took the plunge, lopping off the legs and zipped the crotch area closed. I remember reading that the bag would be better lined so I chose a sturdy black denim from some cut-offs as the liner.
I fashioned the straps by braiding the cut-off pant legs,
but had to undo part of the lining in order to attach it without showing.
I added all the embellishments I could find, using the original bags from the jean purse project as my inspiration. Finally I added the zipper and this is the final result.
The front:
The back:
and the innards:
I've only used it maybe 3 times because it's so "crafty" looking.
Project Post-mortem
I think if I were to do this project again, I would:
- stitch down and then inside-out the straps so they don't fray so much
- maybe braid a leather lace into the strap
- use a hot pink or orange liner to make it easier to see the purse contents
- also, I would use a non-stretchy jean so it doesn't turn out so floppy
Sunday, 20 November 2011
|
|
Not so Extreme Couponing |
Having seen the huge savings that people can get from clipping coupons, I decided to try it too. Of course, up here in Canada, we don't have those double your savings deals that are available in some states.
I've been saving a few dollars here and there, but nothing even close to getting the whole shopping cart for free that they show on tv. No big deal, a few dollars off is better than nothing.
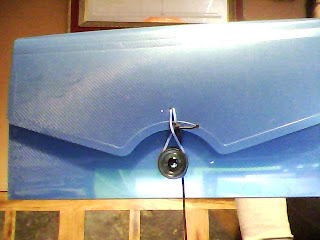
The main problem though is having a place to organize the coupons. I was using this:
I think it's a small cancelled cheque holder - got it at the $ store ages ago. But even though it's got quite a few slots, it's hard to find the coupons because they are all smooshed together:
and you have to take them out of the pocket to browse through them. After a few frustrating weeks of this, I finally searched online and found this: Make a Coupon Binder.
I tweaked it a bit so as not to spend any actual money:
- To prevent the coupons falling out, I re-used an old zippered time management calendar binder instead of an elastic band
- For the pages, I found some photo insert pages (remember those? they have a slot for a 3.5 photo - who even uses them these days?). They used to be quite expensive, but I had a pile of unused ones. I think the size is better than the baseball card inserts.
Subscribe to:
Comments (Atom)

